
In earlier lessons, we explored the configuration of CameraPixels, delved into the necessary permissions, and examined interactions with CameraPixels in both auto and manual modes. This tutorial will focus on the process of switching between capture modes and adjusting their parameters.
Capture modes
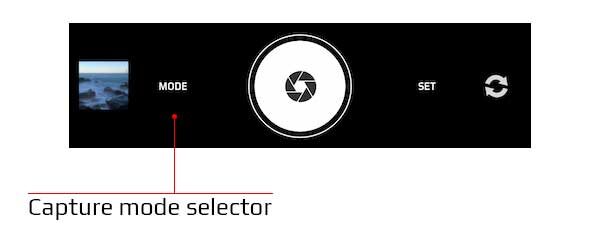
To transition between modes, simply press the 'Mode' button located on the capture controls toolbar.
Your device's CameraPixels functionality may vary, accommodating as many as 9 capture modes, such as Photo, Video, and various Bracketing options. Here is a compilation of supported capture modes for the back camera (wide and telephoto) on the iPhone 11 Pro Max:
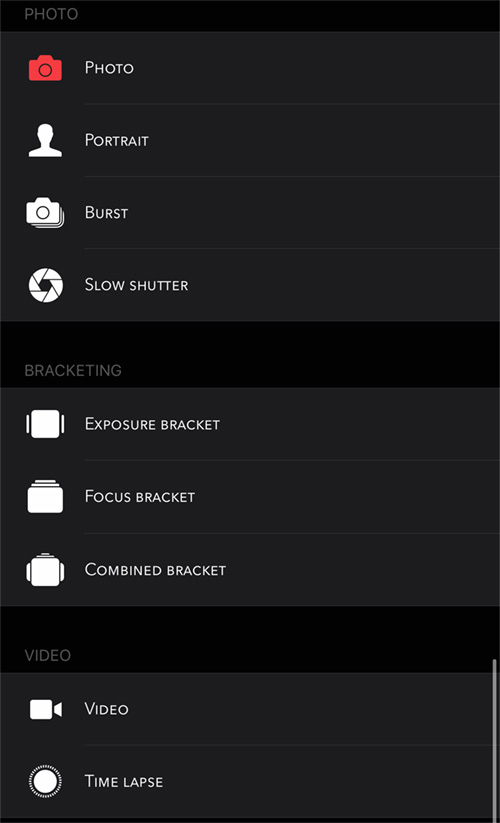
In the capture mode selector dialog, scroll vertically to choose the desired capture mode. Each mode is optimized for a specific use case, so it's crucial to comprehend when to utilize each one.
Photo.
This serves as the default photo mode designed to capture single or series of images with utmost quality. Choose this mode when prioritizing quality over the speed of consecutive image captures. The mode supports processed formats (JPG/HEIC/TIFF - depending on your device) as well as RAW and ProRAW capture (limited to devices and cameras that support it).
Portrait
The portrait mode is accessible on dual and triple-camera devices or those equipped with a TrueDepth camera. This mode enables the capture of depth information alongside the color photo, and the recorded depth can be utilized to simulate various apertures.
Burst
This photo mode is optimized for speed, with CameraPixels aiming to capture images as quickly as possible. Opt for this mode when the priority is on the speed of capture rather than the quality of the captured photos.
Slow shutter
This photo mode employs computational photography to simulate a slow shutter effect. The mode offers two options that dictate how captured images are combined to simulate distinct effects: blurring or light painting. Utilize this mode to create smooth water or achieve captivating light painting effects.
Exposure bracket
This mode is optimized for capturing an exposure bracket, generating up to 15 images per bracket. Exposure brackets are useful for creating high-quality HDR images (requiring third-party software). Additionally, you can employ this method to capture a few images with varying exposures and subsequently select the best one for further processing.
Focus bracket
This mode is specifically crafted for capturing focus brackets, allowing up to 100 images per bracket. Focus brackets are employed to simulate an extended depth of field when the native depth is insufficient, particularly prevalent in macro photography, using a technique known as focus stacking. The captured images can be seamlessly stacked together using specialized software to achieve the desired depth of field.
Combined bracket
This mode is tailored to capture combined focus and exposure brackets. For each focus distance value, CameraPixels captures the exposure bracket with the selected settings. The captured images can then be stacked together using specialized software to attain the desired depth of field and dynamic range.
Video
This mode is optimized for capturing both standard and high-speed videos, capable of reaching up to 240 fps (the maximum speed is dependent on your device). Additionally, the mode supports various output codecs, with the available options contingent on your device and the camera in use.
Time lapse
This mode provides the capability to capture time lapses with user-specified delays between consecutive frames. Utilize this feature to simulate the fast-motion video effect, allowing you to condense extended periods into visually dynamic and accelerated sequences, adding a unique perspective to your content.
The chosen mode icon is prominently showcased on the shutter button, ensuring constant awareness of the active capture mode. The on-screen controls dynamically align with the current capture mode, indicating the accessible features at any given moment. For example, on dual-camera devices, selecting the Portrait capture mode hides the camera selector since only one camera is available. On the iPhone 11/12 Pro (Max), the camera selector displays only 1x and 2x icons, indicating that only the wide and telephoto cameras are accessible in the Portrait capture mode.
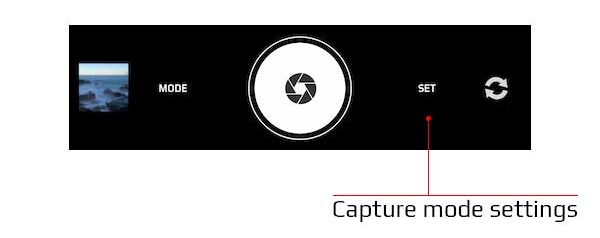
Capture mode settings
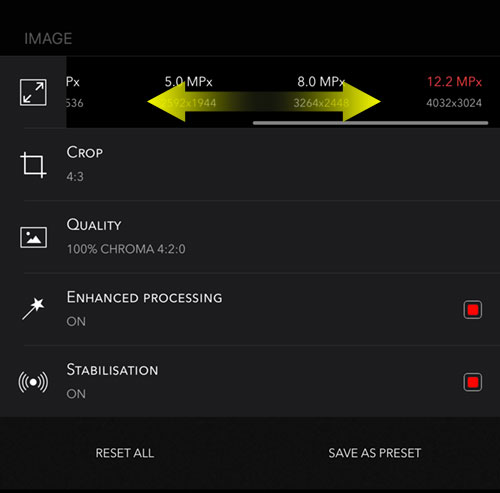
After selecting the capture mode, you have the flexibility to fine-tune its parameters. For instance, in the Photo capture mode, you can adjust image resolution, crop, quality, and choose whether to utilize enhanced processing such as SmartHDR or Deep Fusion on supported devices. Additionally, you have the option to adjust image stabilization, timer duration (helpful in preventing camera shakes when releasing the shutter), and leverage the full intervalometer feature to capture a series of images with specified delays between successive captures.
To access the settings for the capture mode, utilize the SET button located on the capture controls toolbar:
To modify a specific setting, scroll vertically until you locate the desired option. Explore the available settings by navigating through the list, ensuring you find and customize each parameter according to your preferences.
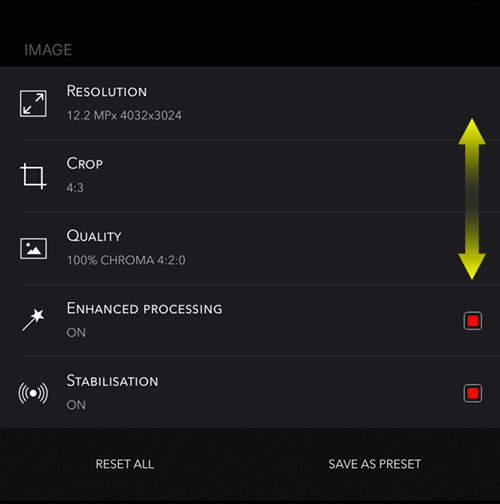
Tap on the specific setting, and then scroll horizontally to navigate through and select the desired value. This is particularly applicable for settings that offer more than two options. Take control of each setting by choosing the values that best suit your requirements, enhancing the customization of your capture experience.
The array of settings presented in the capture mode settings dialog is contingent upon the specific camera and chosen output format. For example, if the DNG (Digital Negative) output format is selected in the Photo capture mode, the Image section within the settings will exclusively feature the Image Stabilization setting. Other settings that are incompatible with raw capture will be concealed, streamlining the options available to align with the chosen output format.
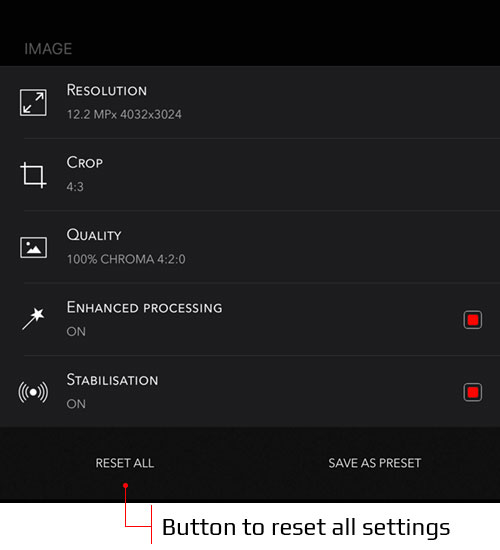
To revert all settings, including media output format, flash/torch state, and camera selection, back to their default values, press the 'Reset All' button in the capture settings dialog.
As mentioned earlier in the Configuring CameraPixels tutorial, the app initiates in Photo capture mode with default settings. To enable persistent settings, activate the 'Persistent capture settings' option in the global settings dialog. It's important to note that each capture mode maintains its distinct set of settings, and they are not shared or transferred between different capture modes.
Conclusion
In this tutorial, we explored the process of selecting various capture modes and fine-tuning their settings. In the upcoming tutorial, we will delve into the creation of presets—specific capture modes with predefined settings. This feature allows for a more streamlined and efficient approach to configuring CameraPixels for specific shooting scenarios or preferences.
Hello, i purchased your app, is there a tutorial on how to use the focus stacking option.
Thanks
Ich habe die Fokus-Lupe doch gefunden, eigentlich intuitiv!
Herzlichen Glückwunsch zu dieser absolut perfekten App. ich bin so glücklich mit ihr.
Sie braucht auf jeden Fall noch mehr Tests und Reviews um noch bekannter zu werden, eine All-In-One-Lösung die Seinesgleichens sucht (und nicht finden wird).
Thank you, happy to hear that you like the app!
Hallo,
wo finde ich die Fokus-Lupe?
In der Seitenbeschreibung im App Store sehe ich ein abgebildetes Bild mit dieser Funktion, in der App finde ich jedoch nichts.
Dies wäre sehr schön zu haben.
Hi there. I use a 14 Pro Max.
In VIDEO Mode I can't change ISO and SEC when using the normal camera lens (1x), greyed out.
Within all other lenses everything is ok.
What can I do? What is wrong?
Our apologies, there was a bug in the code that we fixed in 2023.1.0 release
I am trying to use CameraPixels for focus stacking. How do you set the first focus point and what direction does it then adjust focus, front to back or back to front. I did not see a tutorial on how to set this up.
Ted
We're revising our tutorials now and will add a few new tutorial specifically for various types of bracketing. The focus bracketing works from front (close to the camera) to back (at distant from the camera)
I bought this app to combine my bracketed photos taken on my drone but don’t see any way of doing it?
CameraPixels doesn't support merging of multiple images (as it's mentioned in the app's description in the App Store).
obtaining good results in jpeg and heic, but photos in DNG and DNG+ often became defocussed/blurred (heavilly)? what coul idone wrong? Note: i've been taking exposure braketing with 5 photos.
Hi there. RAW and ProRAW images look defocused only because you see the low resolution embedded jpeg preview for those files. To see the full resolution image use Photos app (in some cases you will need to press Edit to see the full resolution image instead of its preview)
Camera pixels should use EV values for exposure bracketing instead of changing the ISO. Most HDR software does not deal well with ISO changes for composing a HDRi image.
CameraPixels support all 3 types of brackets, AEB (auto-exposure bracket), ISO and Shutter brackets. In all cases the exposure value is changed, so it doesn't matter what bracket type you use to create HDR
I got the camerapixels pro app for my iPhone12. Because I wanted to be able to control the flash while shooting video. I recorded 3 clips and they are nowhere to be found... I tripled check and it was definitely recording at the time, I could see the timer and everything. I have no idea why those videos are gone and why the app didn't save them... the only think I can think of is that Once you press the record button, the video doesn't get saved if you don't the same button again to end it. but It shouldn't be like this, because this means that if you swipe up on accident or click the side button on accident, then you loose all your footage.