
As previously mentioned in our post "Focus stacking for macro photography using Helicon Focus" one of the challenges in macro photography is the shallow depth of field (or DoF for short). The range of the in-focus zone drastically falls off when the camera gets closer to the subject.
The DSLR photographers with expensive lenses can partially deal with the issue by narrowing an aperture to decrease the fall-off in sharpness. For mobile photographers, aperture changes is not an option, since it's fixed on all current iOS devices. The good news is that both, DSLR and mobile photographers, can use a technique called Focus Stacking to extend the depth of field.
Bellow is the example of a standard (left) and extended (right) depth of field photography using an iPhone device.
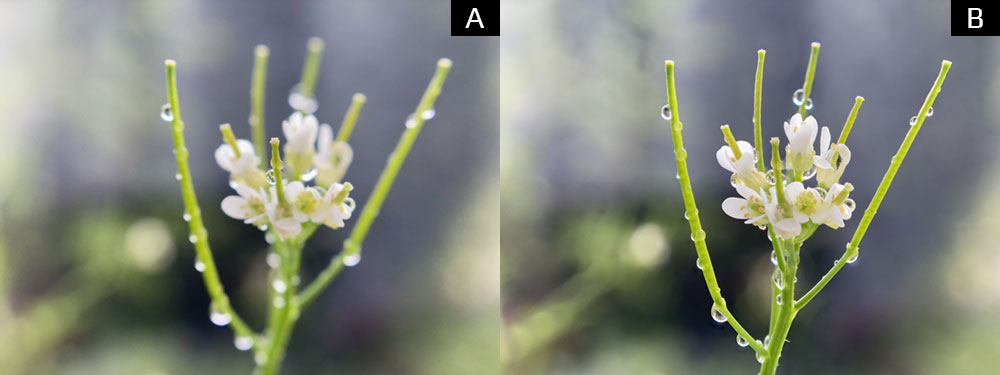
The left image was captured by focusing on the closest water drop of the flower, while the right image was produced from a series of 30 images with different focus distances.
Capture a focus bracket
In order to capture a focus bracket (or stack) you would need:
- The latest version of CameraPixels PRO or CameraPixels Lite (reduced resolution)
- Tripod for an iPhone
- Something to capture (preferably static)
Put your iPhone on a tripod such that the scene you want to capture is visible in the viewfinder of CameraPixels.
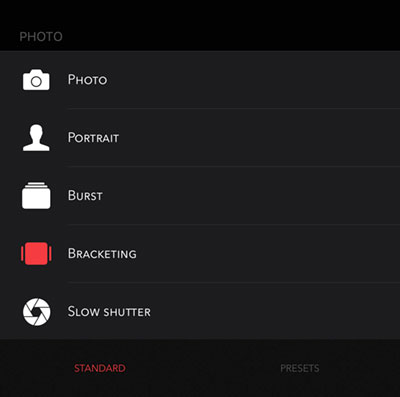
1. Switch CameraPixels to Bracketing capture mode (use the Mode button to open capture mode selection dialog)
2. Select the output file format using the top toolbar

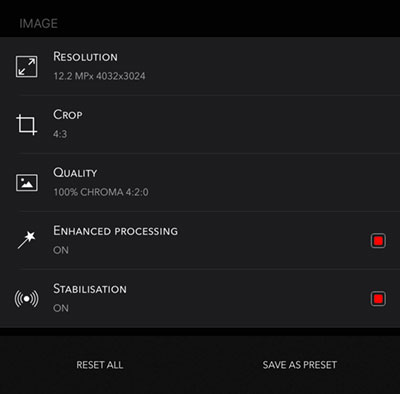
3. Open capture mode settings and adjust resolution, crop, and quality of the final images. If you have iPhone XS (Max) or iPhone 11 (Pro Max) turning Enhanced processing will activate Smart HDR or Deep Fusion techniques.
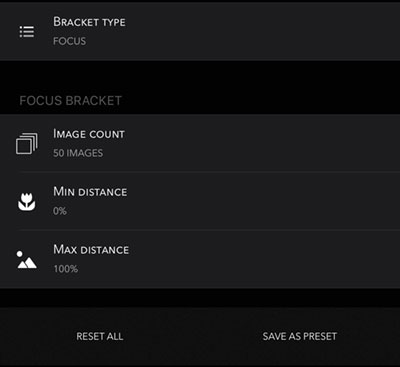
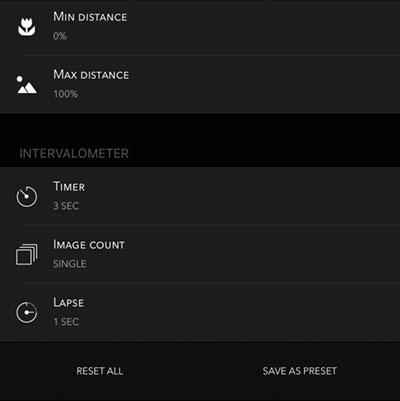
4. While in capture mode settings, scroll down and set the Bracket Type to Focus. Adjust min and max focus distance and number of images to capture.
5. Scroll further down to the Intervalometer section and set Timer to 1 or 3 sec to prevent blur from camera shacking when the capture button is pressed. You can also use Bluetooth remote or headphones to trigger the capture. Just make sure that your Bluetooth remote simulates the volume button press.
6. Press capture button and wait until all images are captured
Once all images were captures, have a look at them in Photos app or preview in CameraPixels just to make sure that all details of the scene in focus in at least one of the photos. It may take some practice to find the right range of focus distances and the number of images to capture all details for a particular scene. As a general rule, for macro photography, you would need a full range with 30-50 images. For landscape and architecture photography fewer images may be enough.
Creating extended depth of field photo
Once all needed images have been captured and reviewed it's time to fire up the Adobe Photoshop that is capable of combining multiple photos and produce one with extended depth of field.
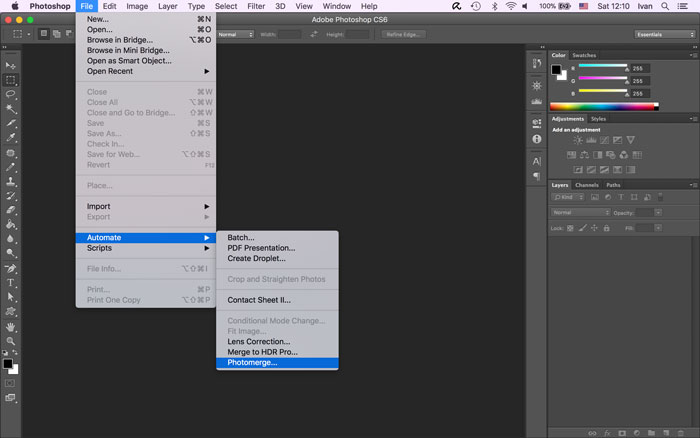
1. Open Photoshop. In menu File find Automate item and then Photomerge sub-item
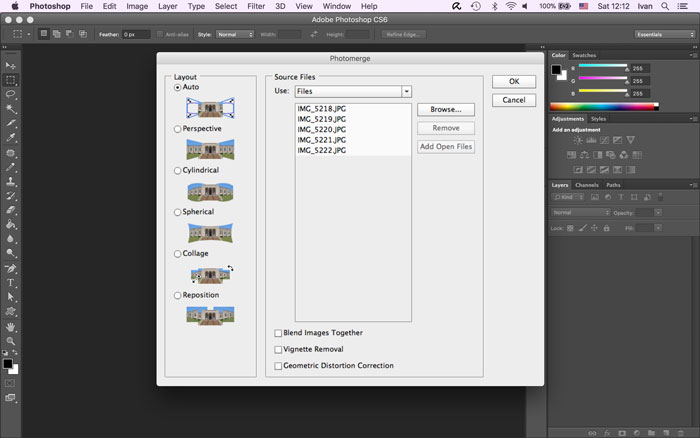
2. In the appeared dialog press Browse button and select all images you have captured for a given scene. Deselect Blend Images Together option and press OK
3. All selected images will be loaded in one document as layers. Select all layers and in menu Edit select Auto-Align Layers item.
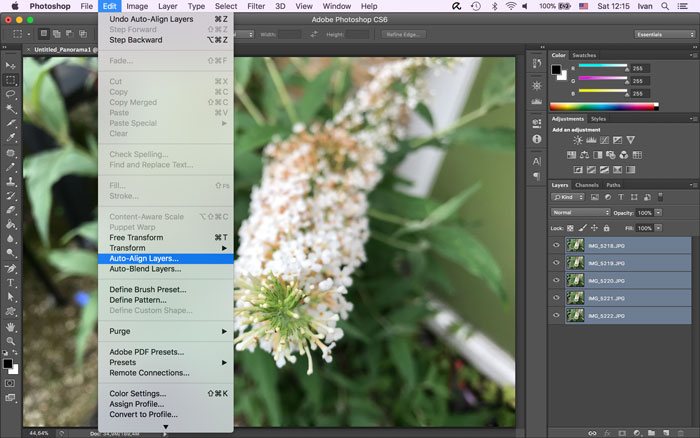
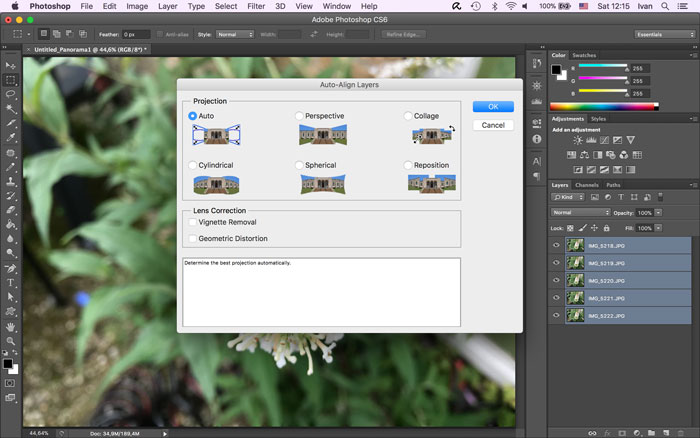
4. In the Auto-Align Layers dialog select option Auto and press OK
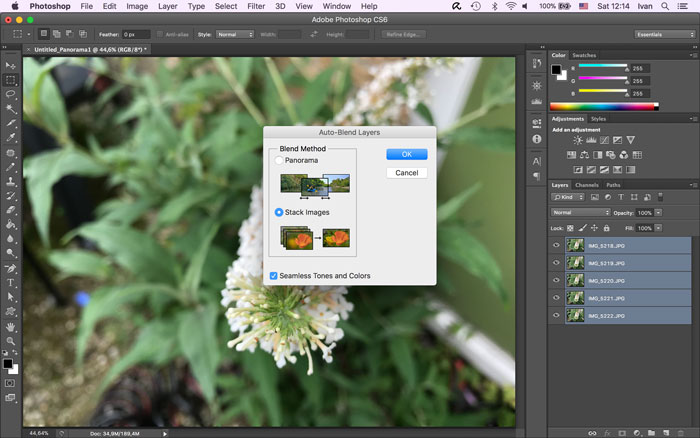
5. Next, without deselecting layers, in menu Edit select Auto-Blend Layers item

6. In the Auto Blend Layers dialog select Stack Images option. You can optionally check Seamless Tones and Colors option and press OK.
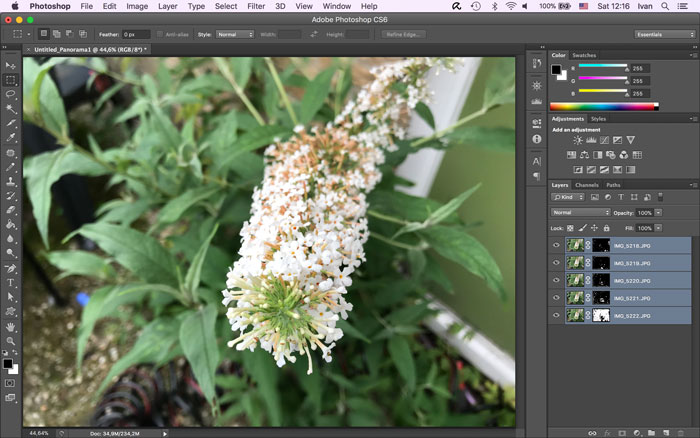
7. Once images are processed you will have a mask associated with each image on the layer. At this point, you can review the result, adjust each mask individually in case of processing errors and blend images into one final result
I have found that for focus stacking Photoshop is a) slow, and b) often inaccurate. My favourite tool for focus stacking is now Affinity Photo. The whole process is easy, fast and accurate.